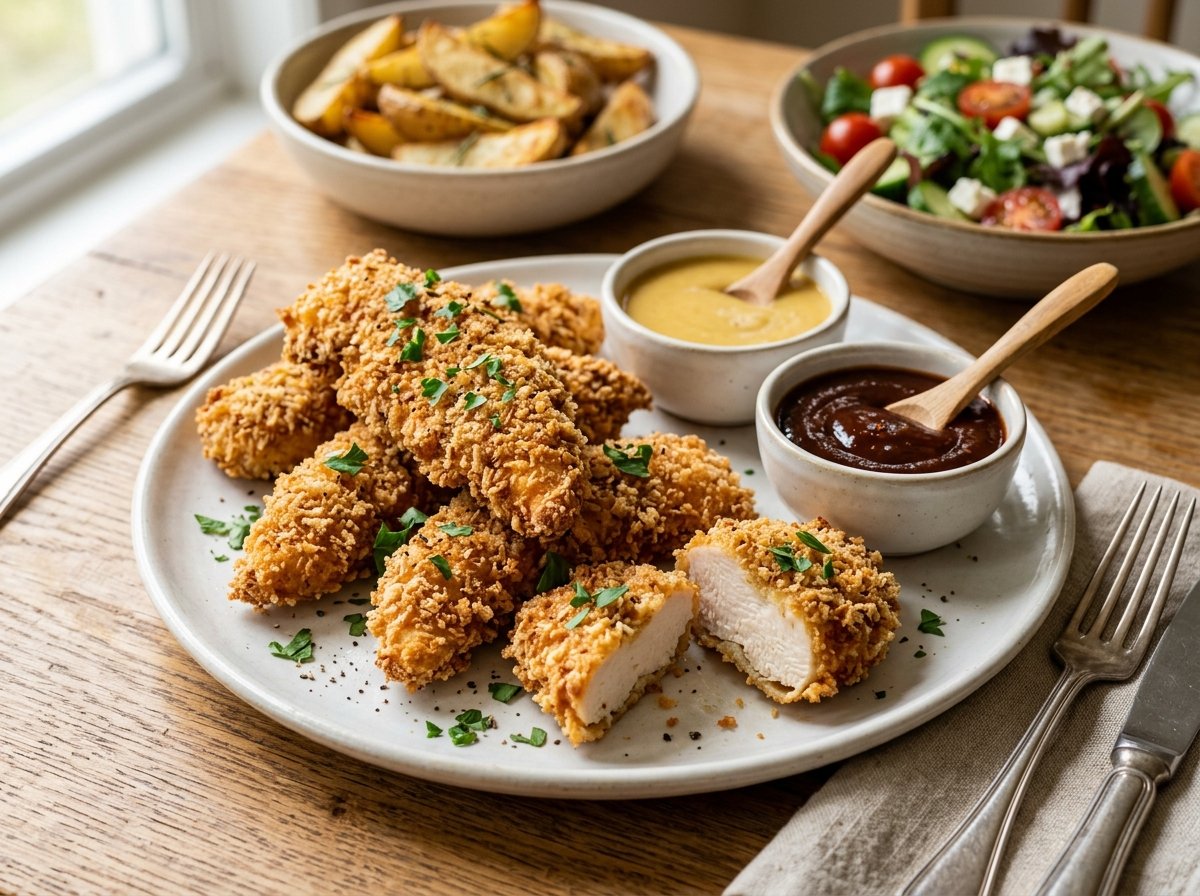
Crispy Baked Chicken Tenders: An Easy Family Recipe
If you are looking for a simple dinner that both kids and adults can enjoy, crispy baked chicken tenders are a perfect choice. These homemade chicken tenders have a crunchy, golden coating on the outside while staying tender and juicy inside. Best of all, they are baked in the oven instead of deep-fried, making them an easy option for a family meal.
This recipe uses straightforward ingredients and a simple breading technique. Chicken strips are seasoned, coated with a crispy breadcrumb mixture, and baked until golden brown. You can serve them with your favorite dipping sauces, fries, roasted vegetables, salad, or even place them inside sandwiches and wraps.
Once you learn how easy it is to make homemade chicken tenders, you may never need to rely on frozen tenders again. They are perfect for busy weeknights, family lunches, casual gatherings, and meal prep.
Why You’ll Love These Baked Chicken Tenders
These chicken tenders are designed to be easy, flavorful, and family-friendly. The oven does most of the work while the breadcrumb coating creates a satisfying crunch.
- Easy to prepare with simple ingredients
- Baked instead of deep-fried
- Crispy and golden on the outside
- Tender and juicy inside
- Kid-friendly and family-approved
- Ready in about 30 minutes
- Easy to customize with different seasonings
- Great for meal prep and leftovers
Ingredients You’ll Need
The ingredients for homemade chicken tenders are simple and easy to find.
For the Chicken
- 1 1/2 pounds boneless, skinless chicken breasts
- 1 teaspoon salt
- 1/2 teaspoon black pepper
- 1 teaspoon paprika
- 1/2 teaspoon garlic powder
- 1/2 teaspoon onion powder
For the Breading
- 1 cup all-purpose flour
- 2 large eggs
- 1 tablespoon milk
- 1 1/2 cups panko breadcrumbs
- 1/2 teaspoon paprika
- 1/2 teaspoon garlic powder
- 1/2 teaspoon Italian seasoning
- 1/4 teaspoon black pepper
- 1/2 teaspoon salt
- 2 tablespoons olive oil or cooking spray
Why Panko Breadcrumbs Work So Well
For especially crispy baked chicken tenders, panko breadcrumbs are an excellent choice. Panko has a lighter and more coarse texture than traditional breadcrumbs, which allows the coating to become crisp and crunchy during baking.
Traditional breadcrumbs can still be used, but the final texture may be slightly more compact. For the crunchiest coating, choose plain panko and season it yourself.
You can also combine regular breadcrumbs with panko if you want a finer coating while still maintaining some crunch.
How to Prepare the Chicken
Step 1: Cut the Chicken
Start with boneless, skinless chicken breasts. Pat them dry with paper towels and place them on a clean cutting board.
Cut the chicken lengthwise into strips approximately 1 to 1 1/2 inches wide. Try to keep the pieces similar in thickness so they cook evenly.
If some pieces are considerably thicker than others, gently flatten the thicker sections with a meat mallet. Even thickness is one of the easiest ways to achieve juicy chicken without undercooking or overcooking different pieces.
Step 2: Season the Chicken
Place the chicken strips in a bowl and season them with salt, black pepper, paprika, garlic powder, and onion powder.
Toss gently until every piece is evenly coated. Allowing the seasoned chicken to sit for a few minutes while you prepare the breading gives the seasonings time to settle into the surface.
Set Up a Breading Station
A three-step breading station makes the process organized and simple. Use three shallow bowls or plates.
Bowl 1: Flour
Add the all-purpose flour to the first bowl. You can add a small pinch of salt and pepper if desired.
Bowl 2: Egg Mixture
Crack the eggs into the second bowl. Add one tablespoon of milk and whisk until the mixture is smooth and evenly combined.
Bowl 3: Seasoned Breadcrumbs
In the third bowl, combine the panko breadcrumbs with paprika, garlic powder, Italian seasoning, salt, and black pepper.
Mix the breadcrumbs thoroughly so the seasonings are distributed throughout the coating.
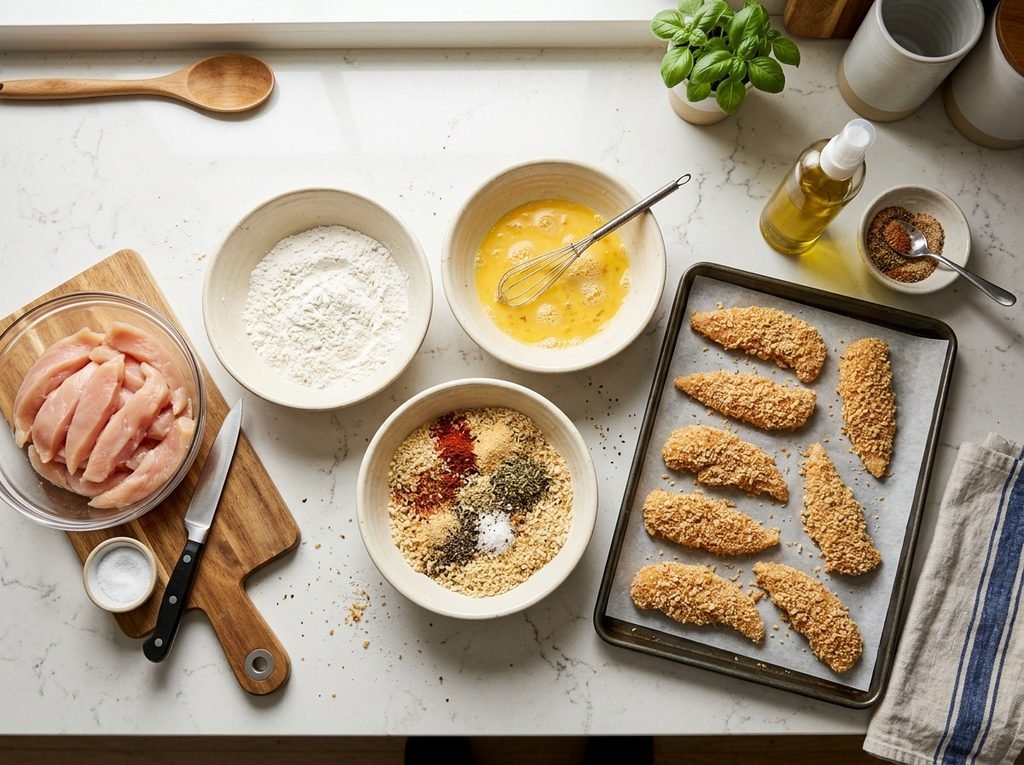
How to Bread Chicken Tenders
Step 3: Coat with Flour
Take one chicken strip and place it into the flour. Turn it over so the entire surface is lightly coated.
Shake off any excess flour. A thin layer is enough because too much flour can create a thick or uneven coating.
Step 4: Dip into the Egg
Transfer the floured chicken strip into the egg mixture. Turn it carefully to coat all sides.
Allow excess egg to drip back into the bowl before moving the chicken to the breadcrumb mixture.
Step 5: Apply the Breadcrumb Coating
Place the egg-coated chicken into the seasoned panko. Press the breadcrumbs gently onto the surface so they adhere properly.
Turn the chicken and coat all sides. Do not simply sprinkle breadcrumbs over the top; gently pressing them against the chicken creates a more secure crust.
How to Get Extra Crispy Baked Chicken Tenders
The key to crispy oven-baked chicken tenders is allowing hot air to circulate around the chicken while giving the breadcrumb coating enough heat to brown.
Preheat your oven to 425°F (220°C). A properly preheated oven helps the coating begin crisping immediately.
For better airflow, place a wire rack over a baking sheet and arrange the breaded chicken tenders on the rack. If you do not have a wire rack, you can place the tenders directly on a lightly greased baking sheet.
Lightly spray or brush the breadcrumb coating with olive oil. This helps the panko turn golden and crisp in the oven.
Step 6: Bake the Chicken Tenders
Arrange the breaded chicken tenders in a single layer. Leave a little space between each piece so they do not steam against one another.
Bake for approximately 18 to 22 minutes, turning the tenders halfway through cooking.
The exact cooking time depends on the thickness of the chicken. The safest way to determine doneness is to check the thickest piece with a food thermometer. Chicken should reach an internal temperature of 165°F (74°C).
The finished tenders should have a golden-brown, crisp coating and tender chicken inside.
Why Your Chicken Tenders May Not Be Crispy
One common problem with baked chicken tenders is a soft breadcrumb coating. Several factors can cause this.
First, make sure the oven is fully preheated. Putting breaded chicken into a cool oven can cause the coating to absorb moisture instead of becoming crisp.
Second, avoid placing the chicken pieces too close together. Crowding traps steam around the tenders and can make the coating soft.
Finally, do not skip the light coating of oil. A small amount of oil helps the breadcrumbs brown beautifully during baking.
Common Breading Mistakes
Using Too Much Flour
Excess flour can create a thick, pasty layer beneath the breadcrumbs. Shake off the excess before dipping the chicken into the egg.
Skipping the Egg
The egg acts as a binding layer that helps the breadcrumbs stick to the chicken. Without it, the coating may fall off during baking.
Not Pressing the Breadcrumbs
Gently pressing the panko onto the chicken helps create a stronger coating that is less likely to fall away during cooking.
Overcrowding the Baking Sheet
Give the tenders enough space for air to circulate. If necessary, use two baking sheets rather than placing everything onto one crowded pan.
Easy Seasoning Variations
The basic seasoning in this recipe is mild and family-friendly, but you can easily change it depending on your preferences.
For spicy chicken tenders, add cayenne pepper, chili powder, or crushed red pepper flakes to the breadcrumb mixture.
For a cheesy coating, mix finely grated Parmesan cheese into the panko breadcrumbs.
For a smoky flavor, replace some of the regular paprika with smoked paprika.
You can also add dried parsley, oregano, basil, thyme, or a small amount of Italian seasoning for a more herb-forward flavor.
Tips for Juicy Chicken Tenders
- Choose chicken breasts with similar thickness.
- Cut the strips evenly so they cook at the same rate.
- Do not overcook the chicken.
- Use a food thermometer to check the internal temperature.
- Preheat the oven fully before baking.
- Leave space between the chicken pieces.
- Use panko breadcrumbs for a lighter, crunchier coating.
With these simple techniques, you can make crispy baked chicken tenders that are flavorful on the outside and juicy on the inside without deep frying.
Best Dipping Sauces for Chicken Tenders
Crispy baked chicken tenders are even more enjoyable when served with a flavorful dipping sauce. You can keep things classic with ketchup or ranch, or try something homemade for a more exciting meal.
- Honey mustard: Sweet, tangy, and perfect with crispy chicken.
- Ranch dressing: Creamy and mild, making it a family favorite.
- Barbecue sauce: Adds a smoky and slightly sweet flavor.
- Buffalo sauce: Great for anyone who enjoys spicy chicken.
- Garlic mayo: Creamy mayonnaise combined with fresh garlic and lemon.
- Sweet chili sauce: A delicious combination of sweetness and mild heat.
Easy Homemade Honey Mustard Sauce
You can make a quick honey mustard dipping sauce with ingredients you may already have at home.
- 1/4 cup mayonnaise
- 2 tablespoons honey
- 1 tablespoon yellow mustard
- 1 tablespoon Dijon mustard
- 1 teaspoon fresh lemon juice
Combine all ingredients in a small bowl and whisk until smooth. Taste and adjust the honey or mustard according to your preference. Refrigerate until ready to serve.
What to Serve with Baked Chicken Tenders
Chicken tenders are versatile enough to work with almost any side dish. For a classic family dinner, serve them with oven-baked fries, potato wedges, or creamy mashed potatoes.
If you prefer a lighter meal, pair the tenders with a fresh green salad, roasted vegetables, steamed broccoli, or sliced cucumbers and tomatoes.
You can also serve them with corn on the cob, coleslaw, sweet potato fries, or a simple rice dish.
Turn Chicken Tenders into a Complete Meal
One easy way to create a balanced family dinner is to combine crispy chicken tenders with a vegetable and a carbohydrate.
For example, serve three or four chicken tenders with roasted broccoli and baked potato wedges. Add a small bowl of dipping sauce on the side and you have a simple meal that requires very little additional preparation.
How to Make Chicken Tender Wraps
Leftover chicken tenders can easily become a completely different meal. Warm a flour tortilla and add sliced chicken tenders, lettuce, tomato, shredded cheese, and your favorite sauce.
Ranch dressing, honey mustard, barbecue sauce, and spicy mayo all work particularly well in chicken wraps.
Fold the sides of the tortilla inward, roll it tightly, and slice it in half before serving.
How to Make a Crispy Chicken Tender Salad
For a lighter lunch, slice the baked chicken tenders and place them over a bed of fresh greens.
Add cucumber, cherry tomatoes, shredded carrots, red onion, avocado, and a light dressing. The contrast between the crisp vegetables and crunchy chicken creates a satisfying salad without requiring complicated preparation.
How to Store Leftover Chicken Tenders
Allow leftover chicken tenders to cool before placing them in an airtight container. Refrigerate them promptly and use them within 3 to 4 days.
For best results, store the chicken separately from dipping sauces and wet ingredients. This helps prevent the breadcrumb coating from becoming unnecessarily soft.
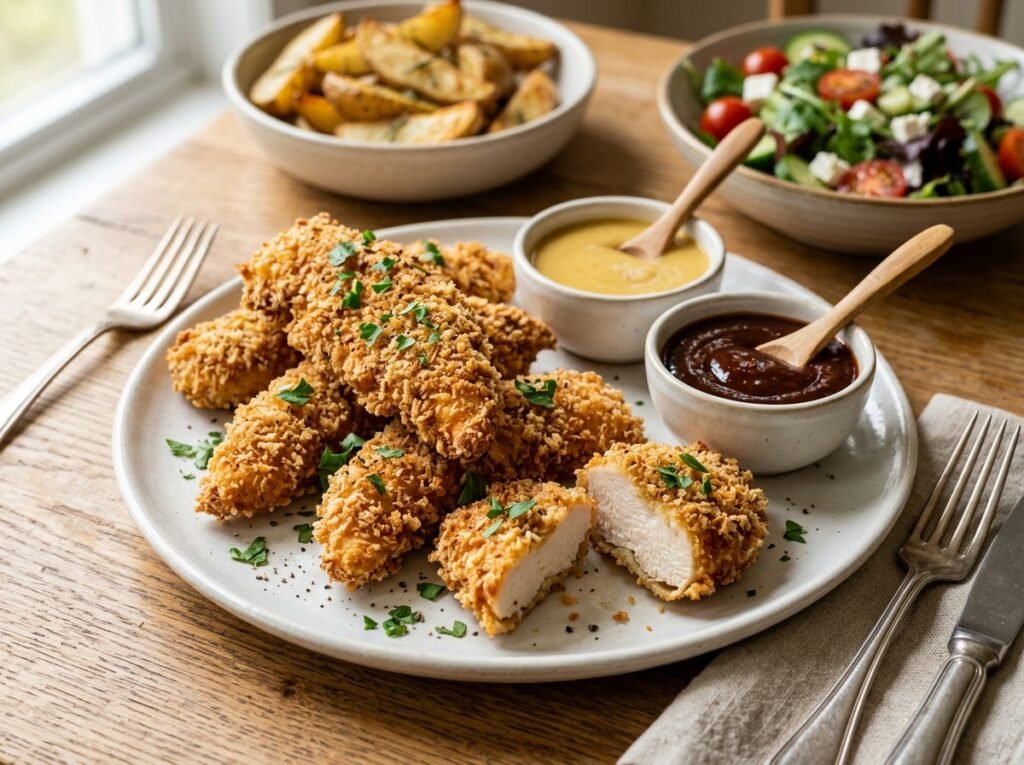
How to Reheat Baked Chicken Tenders
The oven or air fryer is the best option for restoring some of the original crispiness.
To reheat in the oven, preheat it to 400°F (205°C). Place the chicken tenders on a baking sheet or wire rack and heat for approximately 8 to 12 minutes, turning once if necessary.
An air fryer can make the coating even crispier. Heat the tenders at approximately 375°F (190°C) for 4 to 7 minutes, checking that they are heated through.
The microwave is convenient but usually produces a softer coating. If using a microwave, heat the chicken in short intervals to avoid overheating and drying out the meat.
Can You Freeze Chicken Tenders?
Yes. These baked chicken tenders can be frozen, which makes them especially useful for meal preparation.
Arrange completely cooled chicken tenders in a single layer on a baking sheet and freeze them until firm. Transfer them to a freezer-safe container or bag, separating layers with parchment paper if necessary.
For the best quality, use them within approximately 2 to 3 months.
How to Reheat Frozen Chicken Tenders
For the crispiest result, reheat frozen chicken tenders directly in a preheated oven or air fryer rather than microwaving them.
Place the frozen tenders in a preheated 400°F (205°C) oven and bake until heated through and crisp. Cooking time will vary depending on their size and whether they were frozen individually or together.
Always make sure reheated chicken reaches a safe internal temperature before serving.
Make-Ahead Chicken Tenders
If you want to prepare dinner ahead of time, you can bread the chicken several hours before baking. Arrange the coated tenders on a parchment-lined tray, cover them, and refrigerate until you are ready to cook.
When it is time for dinner, preheat the oven and bake the chicken as directed. Avoid leaving raw breaded chicken at room temperature for extended periods.
Can I Use Chicken Tenderloins?
Yes. If you purchase chicken tenderloins, you can use them without cutting them into strips. Their natural shape makes them particularly convenient for this recipe.
Because tenderloins are usually smaller and thinner than whole chicken breasts, begin checking them earlier during baking.
Can I Make These Chicken Tenders Gluten-Free?
Yes. Use a certified gluten-free flour and gluten-free breadcrumbs or panko. Check the labels of packaged seasonings and sauces as well if you need to avoid gluten completely.
The cooking method remains essentially the same.
Can I Make Them Without Eggs?
Yes. If you need an egg-free option, you can use buttermilk or another suitable wet coating to help the breadcrumbs adhere to the chicken.
Another option is to use a thin layer of plain yogurt diluted with a little milk. Make sure the chicken is evenly coated before pressing it into the seasoned breadcrumbs.
How to Make Extra-Crispy Parmesan Chicken Tenders
For a cheesy variation, combine the panko breadcrumbs with finely grated Parmesan cheese.
A good starting ratio is one cup of panko to approximately 1/3 cup of finely grated Parmesan. Add garlic powder, paprika, black pepper, and Italian seasoning.
Coat the chicken as usual and bake until golden and crisp. The Parmesan develops a delicious savory flavor as it browns in the oven.
Spicy Baked Chicken Tenders
If your family enjoys heat, create a spicy version by adding cayenne pepper and chili powder to the breadcrumb mixture.
You can also add hot sauce to the egg mixture. Start with a small amount and increase it gradually depending on how spicy you want the chicken to be.
Serve spicy tenders with ranch dressing, blue cheese dressing, or a cooling yogurt-based dip.
Kid-Friendly Serving Ideas
Homemade chicken tenders are a great way to make a simple family meal more exciting. Let children choose between several dipping sauces and serve the chicken with familiar sides.
French fries, potato wedges, corn, cucumber slices, apple slices, and roasted vegetables can all work well.
For younger children, cut the cooked chicken into smaller bite-sized pieces and allow it to cool to an appropriate temperature before serving.
Frequently Asked Questions
How long should I bake chicken tenders?
At 425°F (220°C), chicken tenders generally take around 18 to 22 minutes, depending on their thickness. Always confirm that the thickest piece reaches 165°F (74°C).
Should I flip chicken tenders while baking?
Yes. Flipping them halfway through cooking can help the coating brown more evenly, especially when the tenders are placed directly on a baking sheet.
Why is my breading falling off?
Make sure the chicken is not excessively wet, coat it lightly with flour, allow excess egg to drip away, and press the breadcrumbs firmly onto the chicken. Avoid moving the tenders unnecessarily before the coating has set.
Can I use regular breadcrumbs?
Yes. Regular breadcrumbs work well, although panko generally provides a lighter and crunchier texture.
Can I cook these chicken tenders in an air fryer?
Yes. Arrange the breaded tenders in a single layer and cook at approximately 400°F (205°C), checking them regularly because air fryer cooking times vary by model and chicken thickness.
Can I use chicken thighs?
Yes. Boneless, skinless chicken thighs can be cut into strips and breaded using the same method. Their higher fat content gives them a particularly juicy texture.
Expert Tips for Perfect Baked Chicken Tenders
- Use panko breadcrumbs for maximum crunch.
- Cut chicken into evenly sized strips.
- Pat the chicken dry before breading.
- Season every layer for better flavor.
- Do not use excessive flour.
- Press breadcrumbs firmly onto the chicken.
- Preheat the oven completely before baking.
- Leave space between each chicken tender.
- Lightly spray the coating with oil before baking.
- Flip the tenders halfway through cooking.
- Use a thermometer to confirm 165°F (74°C).
- Allow the chicken to rest briefly before serving.
Final Thoughts
Crispy baked chicken tenders are one of those recipes that are simple enough for a busy weeknight but delicious enough to become a family favorite. With a crunchy seasoned breadcrumb coating and juicy chicken inside, they offer all the comfort of classic chicken tenders without the need for deep frying.
The recipe is also incredibly flexible. You can keep the seasoning mild for children, add Parmesan for extra richness, introduce chili for heat, or turn leftovers into wraps and salads.
With a few simple ingredients, a hot oven, and the right breading technique, homemade chicken tenders can become a reliable option for lunches, dinners, parties, and meal prep.
Recipe Summary
- Recipe: Crispy Baked Chicken Tenders
- Category: Chicken Recipes
- Prep Time: 10 minutes
- Cook Time: 18–22 minutes
- Total Time: About 30 minutes
- Servings: 4
- Difficulty: Easy
- Cooking Method: Oven baked
- Best For: Family dinners, kids’ meals, lunch, meal prep